Disclosure: This post may contain affiliate links, which means I may earn a commission if you click on the link and make a purchase.
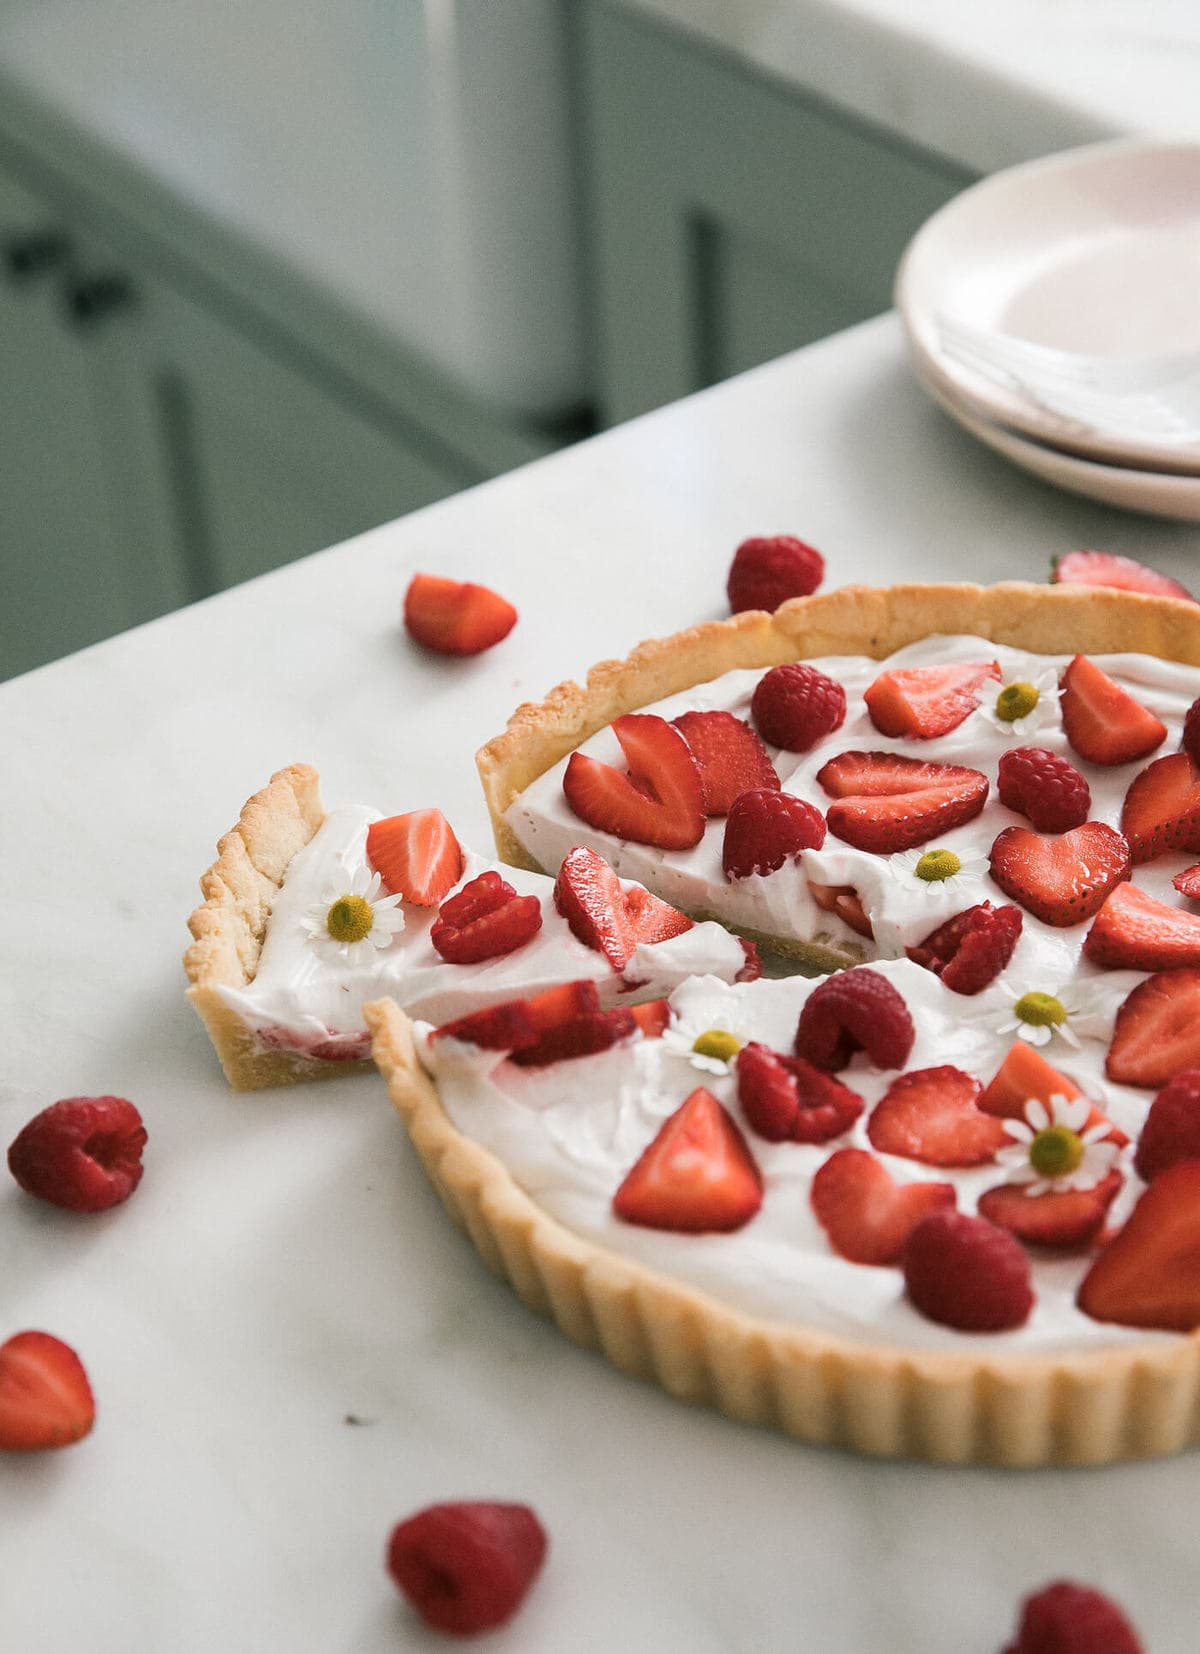
This Gluten-Free Strawberry Tart is made with an almond flour crust topped with a coconut cream filling and fresh strawberries. Not only is this grain-free tart wonderful for coconut lovers, but it’s ideal for people who might not be able to have gluten or dairy. It’s light and creamy and SO simple to throw together in 30 minutes! Serve it with Ground Beef Tacos for the perfect summer meal!
This strawberry tart is SO simple to throw together. It’s grain-free and made with a minimal amount of ingredients just like this Nut Butter Coconut Chocolate Tart and these Mint Chocolate Chip Macarons. If you need more dairy free desserts- Eton Mess, Choco Taco Shells and Honeycomb Candy are crowd favorites!
Ingredients You’ll Need for a Gluten-Free Strawberry Tart
Gluten-free crust – It’s made with coconut oil, almond flour, salt, maple syrup and an egg. It’s super light and tender and comes together easily using a food processor or it can be mixed by hand.
Coconut whipped cream – This strawberry tart is both gluten free and dairy free so we’re topping it with a homemade whipped cream made with coconut milk. It’s lightly sweetened with maple syrup and a touch of vanilla. Thai kitchen is my favorite brand to use and it always whips up nicely!
Berries – I topped the tart with fresh ripe strawberries and raspberries. A handful of blueberries or blackberries would taste amazing as well!
For the rest of the ingredients, please refer to the recipe index card below!
How to Make a Gluten-Free Strawberry Tart:
Make the tart crust. In a food processor pulse all the almond flour crust ingredients together until the dough starts to form a ball.
Bake the crust. Press the dough into a greased tart pan until it’s an even thickness and bake just until set.
Make the filling. Whip together the coconut cream with maple syrup until light and fluffy.
Assemble and serve! Spread the coconut cream inside the tart crust and top with sliced strawberries.
How to make Coconut Cream:
Chill. At least overnight. The longer you let the coconut milk chill you’ll end up with a more firm coconut cream to whip.
Scoop. Separate the cream from the coconut water in the can. Save the coconut water for your smoothies.
Whip. Whip the coconut cream up with a little maple syrup using an electric mixer.
Tips and Tricks
Make sure you are using full-fat coconut milk. Light coconut milk won’t thicken and beat into a nice and fluffy whipped cream.
Make sure your coconut milk is well chilled. Just like with regular dairy cream, coconut milk NEEDS to be very very cold before it will whip up nicely into whipped cream. At least 6 hours for best results.
Don’t want to make a gluten-free crust? Use this Homemade Pie Crust recipe instead!
Recipe FAQs
Do I have to use coconut for this tart? Nope! If you don’t like the taste of coconut you make dairy whipped cream with regular heavy whipping cream or if you are dairy free use a store-bought dairy-free whipped cream. What makes a tart different from a pie? Tarts usually have 1 bottom crust topped with some sort of cream or custard filling and fresh fruit. Tart crusts are also thicker and hold their shape when cut and aren’t as light and flaky as a pie crust.
More Strawberry Recipes
If you tried this Gluten Free Strawberry Tart Recipe or any other recipe on my website, please leave a 🌟 star rating and let me know how it went in the 📝 comments below. Thanks for visiting!
Coconut Whipped Cream + Toppings:
To Make the Gluten-Free Tart Shell:Preheat the oven to 350 degrees F. Generously grease a 9-inch tart pan with coconut oil.In a food processor fitted with the chopping blade, pulse the flour and salt until combined. Add the coconut oil, maple syrup, and egg and blend until the mixture forms a ball.*If you don’t own a food processor, you can make this in a large bowl, you just have to get your hands in there to mix it thoroughly.Lightly press the dough into the tart pan and make sure it goes up the sides of the tart shell is in an even as layer as possible.Transfer to the oven to bake for 10 to 12 minutes, until light golden brown. Remove crust from the oven and allow to cool completely.To Make the Coconut Whipped Cream:Remove the solid coconut cream that has risen to the top of the can, and spoon it into a stand mixer fitted with the whisk attachment. Beat ht coconut cream on high speed until it begins to thicken and peaks form. The remaining coconut water can be saved for drinking later.Using a rubber spatula, slowly fold in the maple syrup and vanilla.To Assemble;Spoon the whipped cream into the center of the tart shell and spread around so it’s in an even layer. Add the sliced strawberries and raspberries and chamomile flowers, if using. This is the best the same day it is made but the crust can be made up to a week ahead of time and stored, well wrapped, in the fridge.
Tips and Tricks
Make sure you are using full-fat coconut milk. Light coconut milk won’t thicken and beat into a nice and fluffy whipped cream.
Make sure your coconut milk is well chilled. Just like with regular dairy cream, coconut milk NEEDS to be very very cold before it will whip up nicely into whipped cream. At least 6 hours for best results.
Don’t want to make a gluten-free crust? Use this Homemade Pie Crust recipe instead!
Equipment:
Food Processor | Stand Mixer | Chef’s Knife | Cutting Board | Offset Spatula
Serving: 6g | Calories: 310kcal | Carbohydrates: 19g | Protein: 9g | Fat: 24g | Saturated Fat: 5g | Polyunsaturated Fat: 0.3g | Monounsaturated Fat: 1g | Trans Fat: 0.003g | Cholesterol: 27mg | Sodium: 109mg | Potassium: 116mg | Fiber: 5g | Sugar: 10g | Vitamin A: 47IU | Vitamin C: 30mg | Calcium: 103mg | Iron: 2mgNutrition information is automatically calculated, so should only be used as an approximation.

